

Note: This article covers AWS machine configuration. If you don't have access to an AWS account or prefer another provider, feel free to skip to the next article.
If you want to configure a remote development machine on AWS, EC2 is the service to use. The first decision is which instance type to pick. There are many options, but it mostly comes down to the kind of work you plan to do.
Choosing the Right EC2 Instance
EC2 offers various machine types tailored to specific workloads. For example, there are CPU-oriented machines for intensive processing and "burstable" machines for workloads that don't need to run at full capacity 100% of the time.
For general programming, the m8i (Intel/x86) or m8g (Graviton/ARM)
instances work well, as do their newer generations if available. They provide a
good balance of CPU and memory for typical software engineering workloads.
The only thing left to figure out is how much RAM and CPU you actually need. Since we will be coding in the terminal, your RAM won't be weighed down by a graphical user interface (GUI), allowing you to get even more performance out of your machine.
To give you a brief idea about costs - m8i.2xlarge instance (8 vCPU, 32 GiB
RAM) with about 6–7 hours of daily usage during working days should cost around
60 USD. You can expect that m8i.xlarge (4 vCPU, 16 GiB) will cost roughly half
of that (~30 USD), and m8i.large (2 vCPU, 8 GiB) around ~15 USD.
Graviton-based instances (m8g) are more affordable if your projects don't
require x86 architecture.
Use the AWS Pricing Calculator to determine the exact total cost based on your specific needs.
Step-by-Step Configuration
Follow these steps to launch and configure your machine:
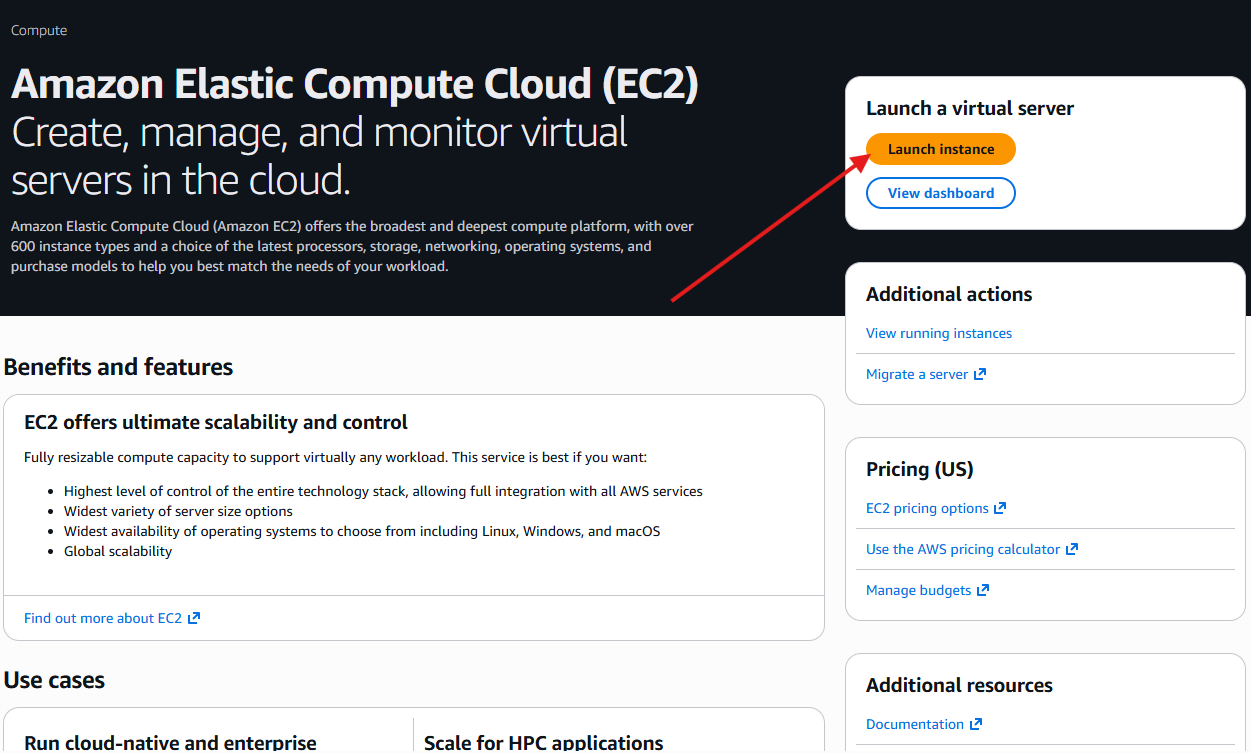
- Log in to the AWS Management Console.
- Navigate to EC2 and click the Launch instance button.
- Name your instance and select Debian as the OS (this is what I use
and recommend for this setup).
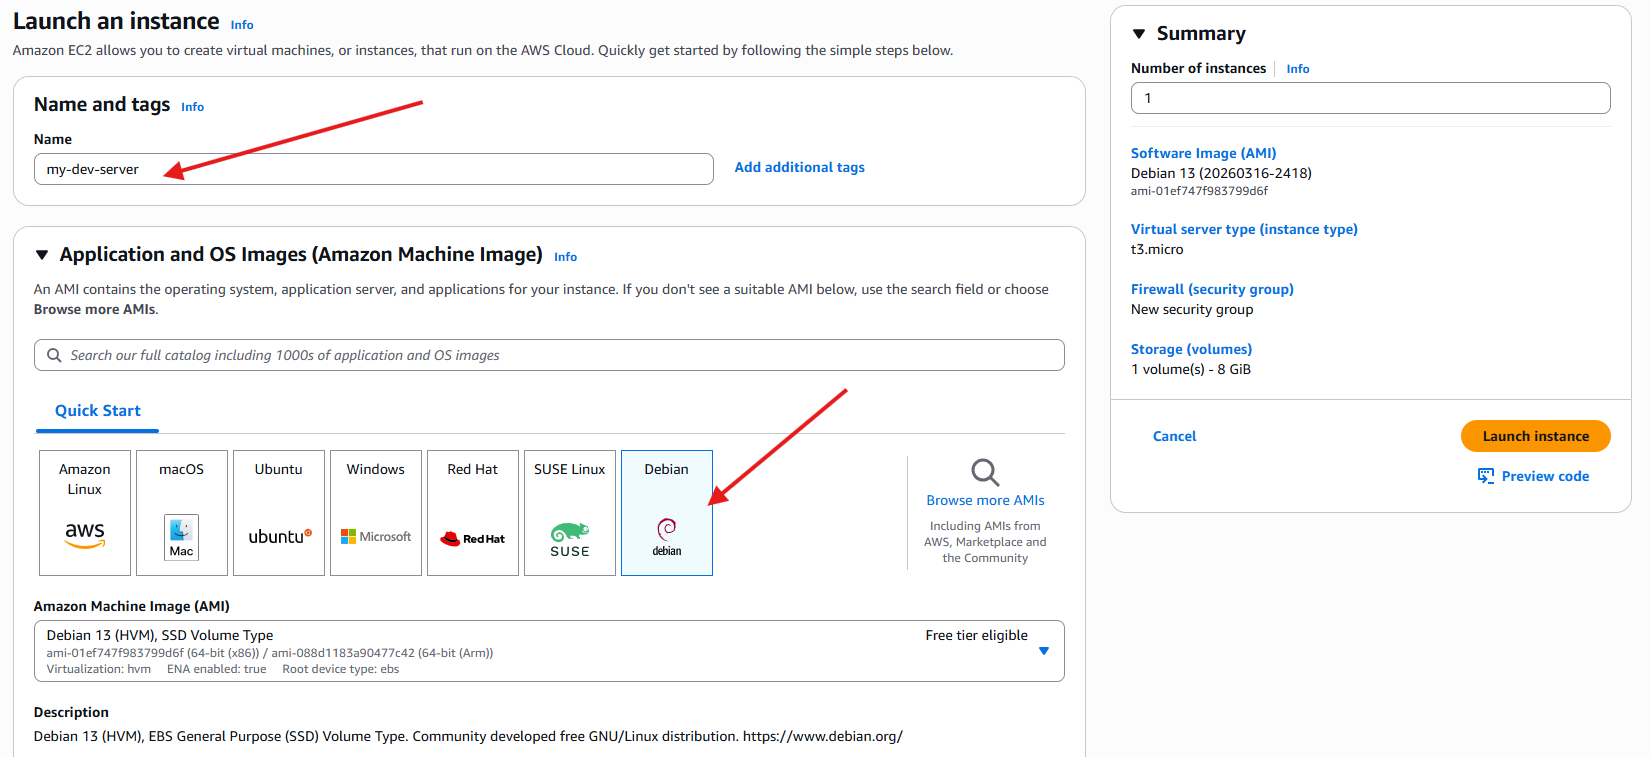
- Select your instance type. As mentioned above, the
mseries is generally sufficient for development. You must also Create a new key pair to securely access your machine. Download the key file and store it in a safe place.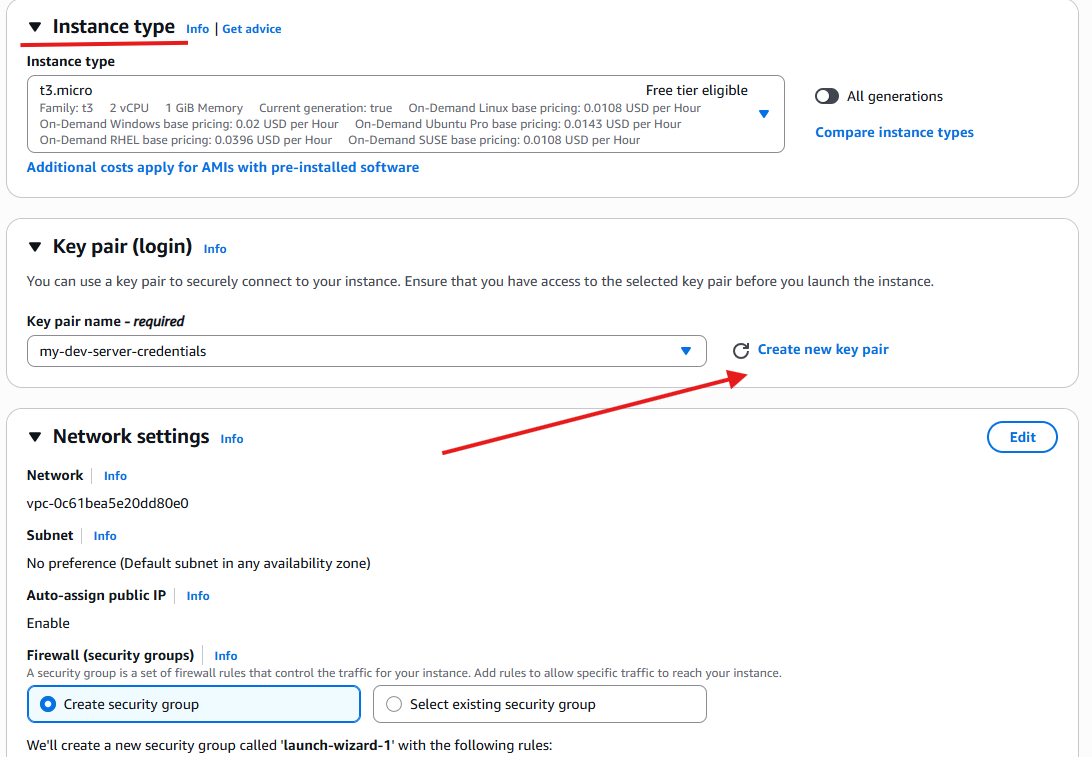
- Edit Network Settings. Scroll down to the network settings section and
click Edit.
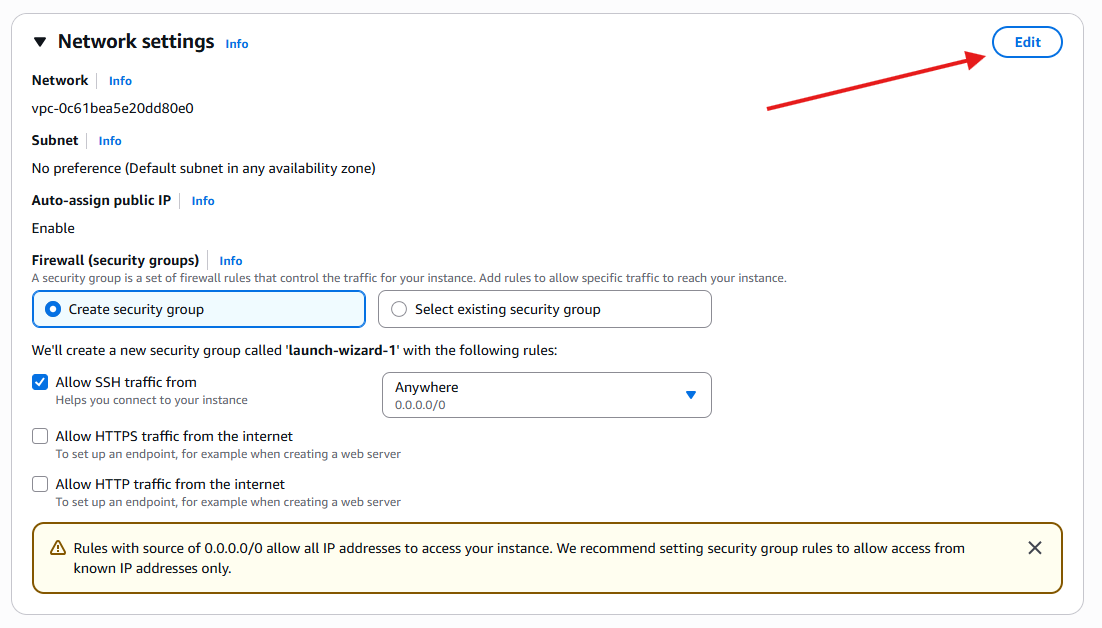
- Configure Security Group. For security reasons, it's best not to use the
default SSH port (22) permanently. Click Add security group rule and
input a custom port number that you plan to use instead.
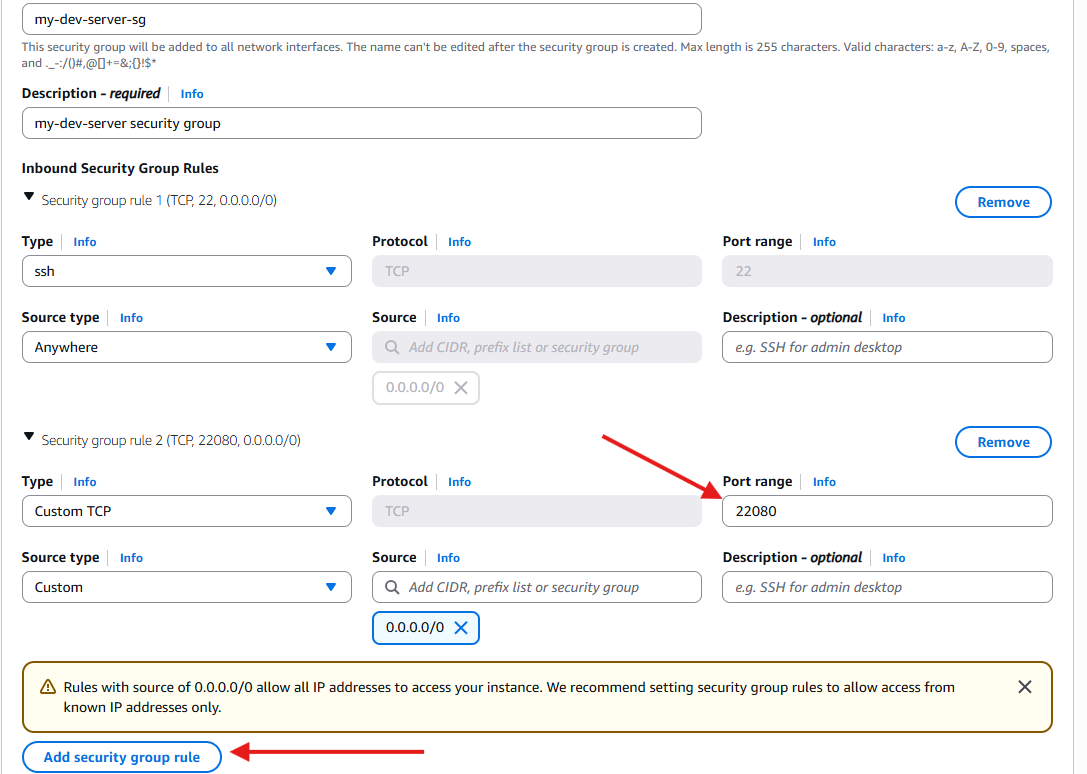
Important: Keep the default SSH port (22) open for now. You will need it for your initial connection. In an upcoming article, I will show you how to configure a custom SSH connection on your server. Once that is done, you can safely remove port 22.
- Launch. Click Launch instance in the summary panel. After a short wait, your server will be ready.
- Review Instance Details. Navigate to the details page of your new
machine.
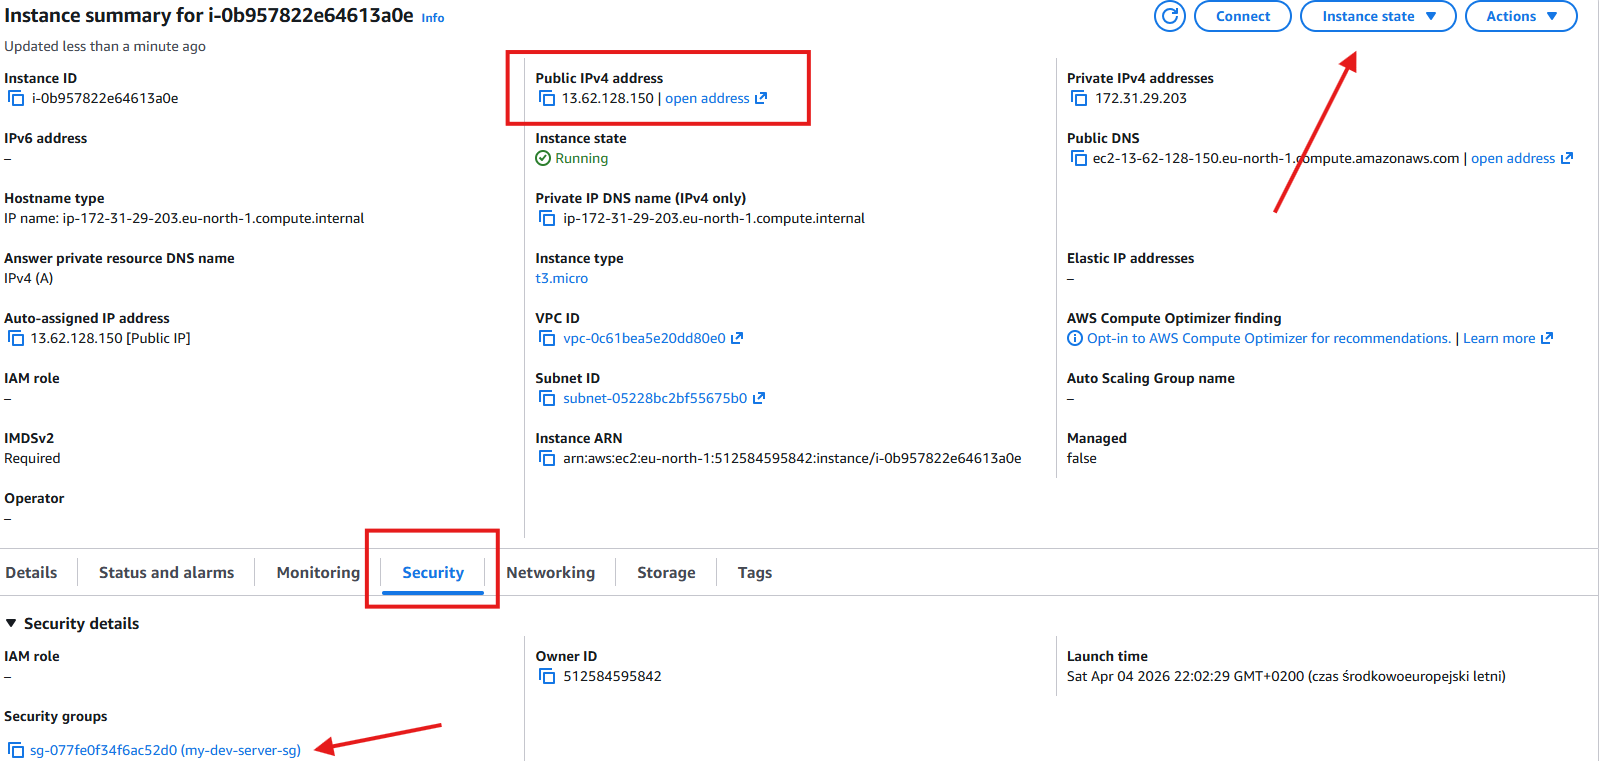
Pay attention to three critical tabs and values on this screen:
- Public IPv4 address: This is the IP you will use to connect to your machine.
- Instance state: This allows you to control your machine's lifecycle. Get into the habit of stopping it when you don't need it and starting it on demand - this helps keep costs down.
- Security: This tab allows you to find and manage your associated security group. You will return here later to remove the default SSH port rule after adjusting your server settings.
With your machine up and running, head over to Connect and Secure your VPS to learn how to establish a connection and properly configure your new server.
Comments